NVIDIA RTX 5090 Ubuntu 24.04 Driver Installation Guide
I’ve recently decided to experiment with small language models and treated myself to a brand-new NVIDIA GeForce RTX 5090 and after installing a fresh Ubuntu 24.04, opened the terminal, typed nvidia-smi and boom No devices were found.
Why? 😢 As of August 1, 2025, Ubuntu 24.04 still ships without a driver that properly supports the RTX 5090, so you’ll need to download one from NVIDIA’s website and install it manually. Drivers from the official Ubuntu repository won’t work yet.
The card only appeared in stores on January 30, 2025, and most tools, libraries, and drivers are still catching up with NVIDIA’s new Blackwell architecture.
If you want a zero-drama consumer GPU for your home lab right now, I think you’re better off with an RTX 4090 or 3090. But if you’ve already bought a 5090, congrats on being ahead of the curve! Just give the software world a couple of release cycles to catch up, and be ready for a bit of extra tinkering in the meantime. I know it’s painful, but chin up - this is just how NVIDIA and Linux have always been. Alright, let’s dive in.
Disable Secure Boot
Open your BIOS settings and disable Secure Boot. In many cases, this step alone fixes the issue.
Why: The proprietary NVIDIA driver isn’t signed with Ubuntu’s keys. With Secure Boot enabled, the kernel will refuse to load it.
Disclaimer: Disabling Secure Boot slightly reduces system protection against low-level malware.
Download the latest driver from NVIDIA’s website
-
Head to NVIDIA’s driver-download page.
-
Under Manual Driver Search, select:
- Product Type: GeForce
- Product Series: RTX 50 Series
- Product: GeForce RTX 5090
- Operating System: Linux 64-bit (Ubuntu)
-
Click Search and download the latest
.runinstaller.
At the time of writing, the latest driver available is version 570.172.08 (released July 17, 2025).
Remove existing NVIDIA drivers
Just to reiterate: as of August 1, 2025, the drivers in Ubuntu’s official repository—whether open-source or proprietary—don’t properly support the RTX 5090 and may interfere with the drivers we’re about to install, so remove them first.
Install build-essential
Make sure that you have build-essential installed.
Shut down GNOME
If you’re running Ubuntu Desktop, you must shut down GNOME first. Switch to a TTY (press Ctrl + Alt + F3), log in, and run:
Install the driver
Find the .run installer you just downloaded from NVIDIA’s website, make it executable, and run it:
During installation, the interactive wizard will ask a few questions. Here are my recommended answers:
- “Multiple kernel module types are available for this system. Which would you like to use?” → Select MIT/GPL.
- “Would you like to register the kernel module sources with DKMS?” → Choose Yes so the driver rebuilds automatically after kernel updates.
- “Would you like to run the nvidia-xconfig utility to automatically update your X configuration file so that the NVIDIA X driver will be used when you restart X?” → Choose Yes.
After the installer finishes, reboot:
Verify installation
Once the system restarts, run:
You should see output similar to:
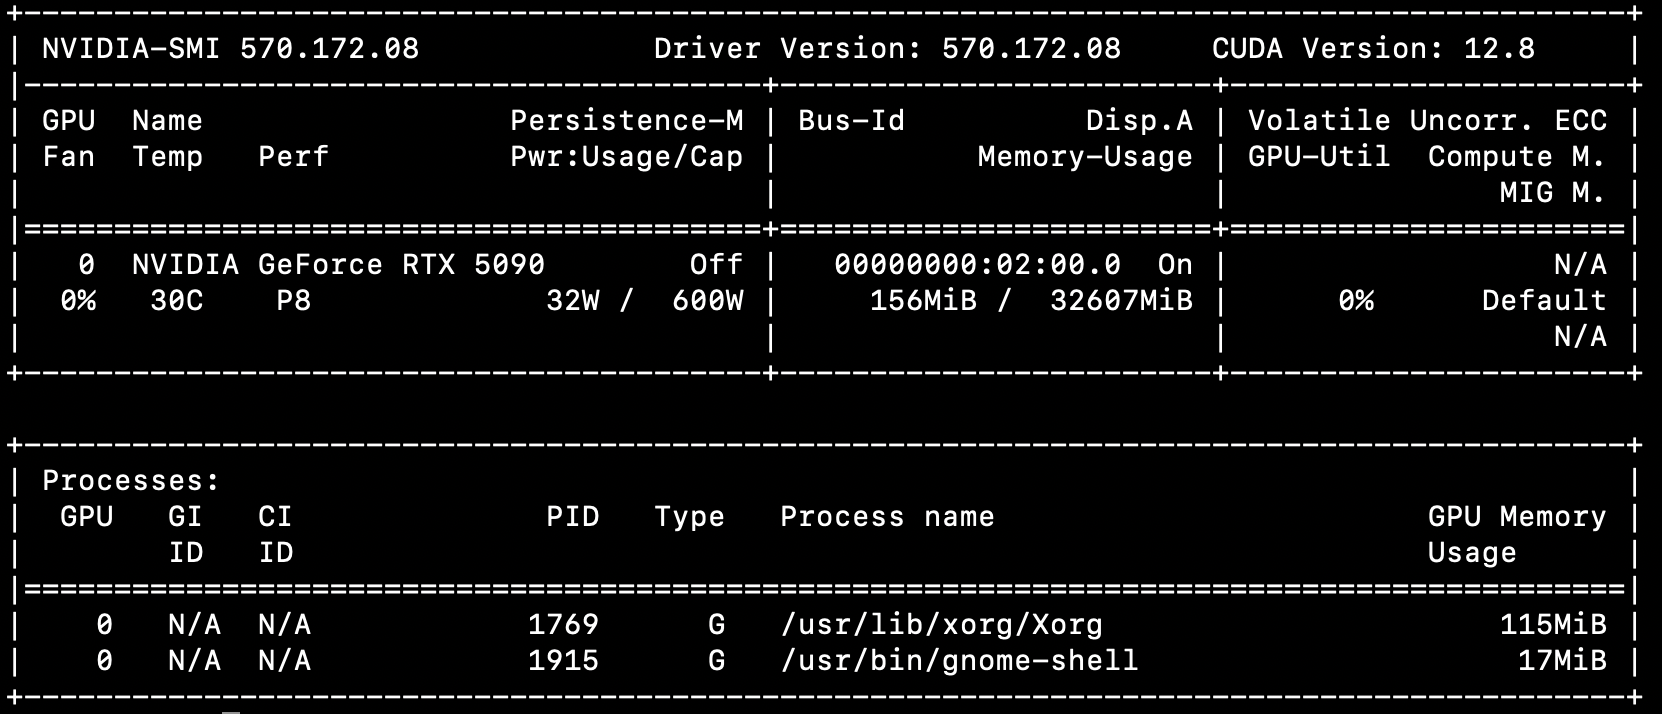
If you’re unlucky and nvidia-smi still doesn’t work, keep Googling and check out the NVIDIA forum. Hope this helps - good luck!
For founders evaluating hardware infrastructure for your AI startup, I work with early-stage teams on exactly these kinds of technology decisions. Learn more about my free mentoring for founders.

About The Author:
Val Kamenski is a fractional CTO, board advisor, and startup mentor with over 14 years of experience building and scaling software companies. He now helps founders and executives make better technology decisions, and navigate the fast-changing world of AI and software development.